The festive season is upon us, and there's no better way to infuse the spirit of joy and creativity into schools than through fun, festive crafts! From colourful ornaments to sparkling decorations, these hands-on projects offer students a wonderful opportunity to express their creativity and spread excitement throughout the school. In this blog, we'll explore a delightful assortment of festive crafts tailored for schools, bringing a touch of merriment to the classroom. So, let's dive into the world of festive crafting and inspire your students to embark on a journey of imagination...
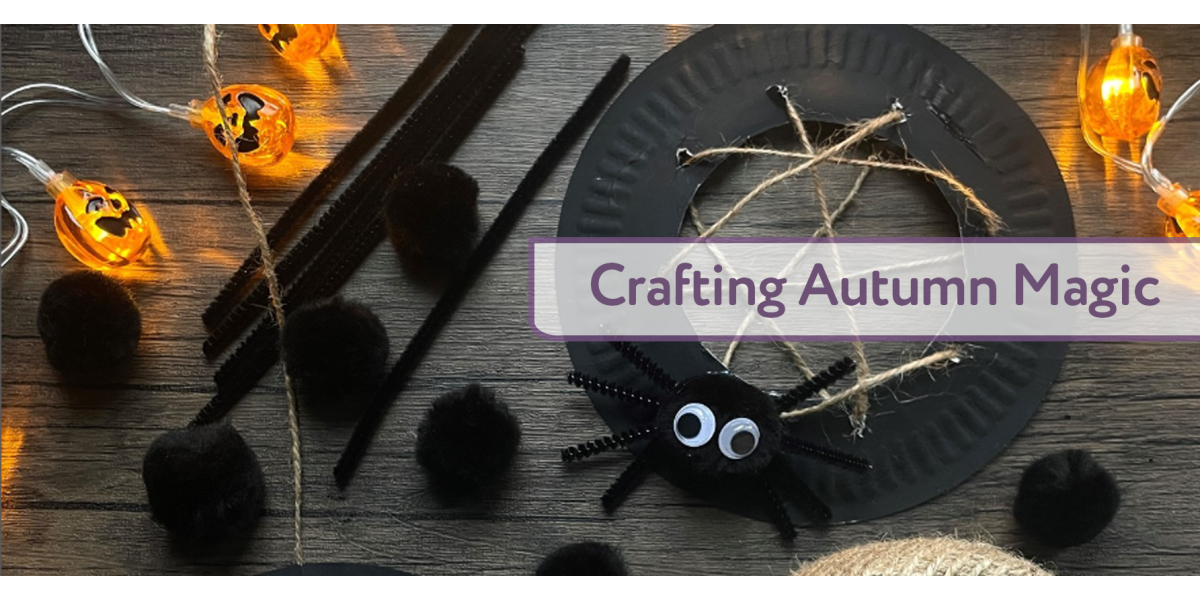
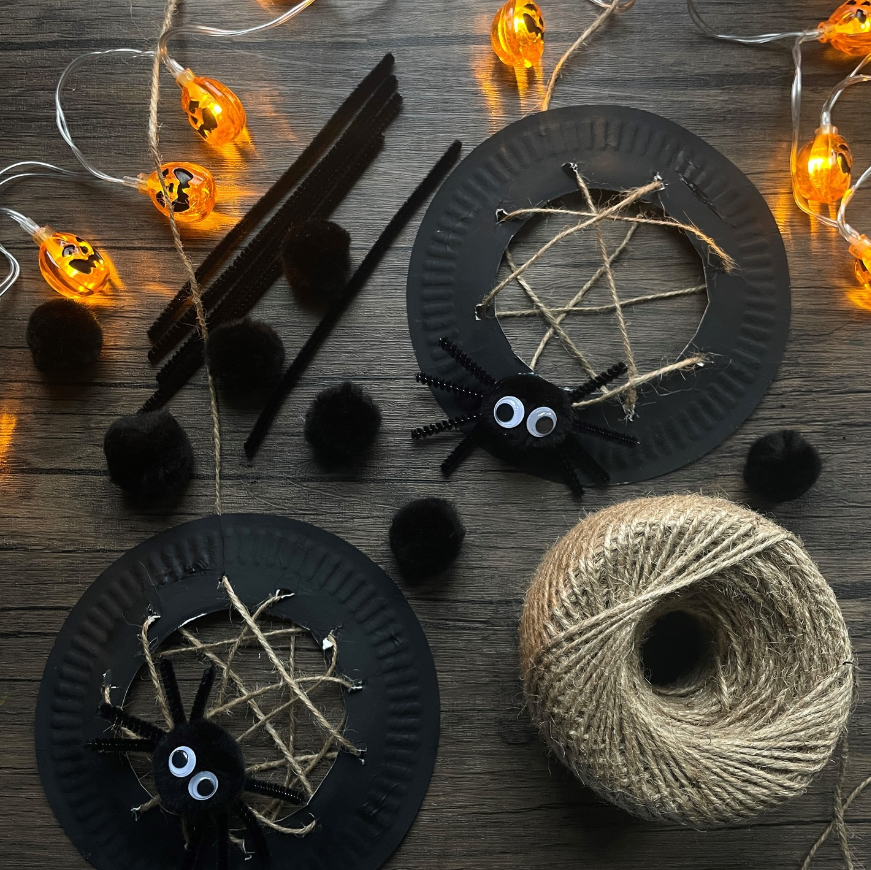
Spooky Spider Web Decorations
You will need -
- Paper Plates
- Black Paint
- Black Pompoms
- Black Pipe Cleaners
- PVA Glue
- Scissors
- Wiggly Eyes
- String
Instructions -
1) To make the web, first get a paper plate and cut the central smaller circle out.
2) Paint the outer circle that you're left with, black. This can be a little messy so we recommend either using a table cloth or putting some old newspaper down.
3) Using the scissors, make small holes around the edge of the circle that you cut out, so that you can then sew the string through the holes in different directions to create your web. Don't forget to tie the end of your string to stop it pulling through!
4) Once you're happy with your web, make a small hole in the paper-plate-frame, and tie a loop of string through so that you can hang your spooky decoration.
5) To make the spider, get a black pompom and stick two wiggly eyes to it using your pva glue.
6) Cut your black pipe-cleaners down to size, then stick these to the bottom of the pompom (you'll need four of these to create the eight legs)
7) Find where you want to stick your spider on the web, then use some more pva to stick your spider(s) in place.
Don't forget to follow us @KCSSocial for more creative crafting ideas!
Handprint Bonfire
You will need -
- Black & White Card
- Hand Towels
- PVA Glue
- Washing-Up Bowl
- Red, Yellow and Orange Paint
- Scissors
- Liquid Soap
- Fluorescent Sand
- Water
- Matchsticks

Instructions -
1) Put some warm water in a bowl with washing up liquid and mix it to create bubbles. Then put the bowl to one side for later.
2) Squeeze red paint onto your hands and rub them together so that they are fully coated.
3) Next place your hands onto the white card to create handprints. Start at the bottom of the card and carefully move up the card angling your hands so that the fingers are pointing outwards. The fingers will begin to create the effect of the flames at the edges and top of the bonfire.
4) Wash your hands in the bowl of soapy warm water and dry them thoroughly on a hand towel.
5) Once the red paint on the card has dried, squeeze orange paint onto your hands and rub them together so that they are fully coated.
6) Carefully create orange hand prints over the top of some of the red fire. Once you are happy with the coverage then wash your hands in the soapy water and dry them.
7) Once the orange paint on the card has dried, squeeze yellow paint onto your hands and rub them together so that they are covered.
8) Place a few yellow handprints on the top of the bonfire to add flames. Once you are happy with the overall look of the bonfire then wash your hands in the soapy water and dry them.
9) Leave the picture to dry and once dry then carefully cut out around the bonfire emphasising the shape of the fingertips to create flames.
10) Use PVA glue to stick the bonfire onto a piece of black card and then carefully drip glue onto the bonfire to create thin lines which will be flickers of fire.
11) Sprinkle fluorescent sand onto the glue and shake the card to remove any excess.
12) Cover a large area at the bottom of the picture with PVA glue and stick the matchsticks on carefully to create the effect of wood piled at the base of the fire.
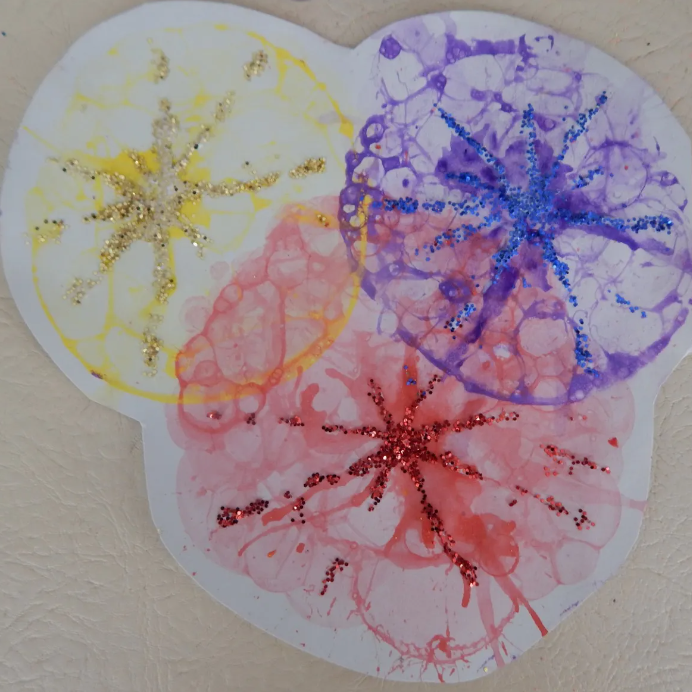
Bubble and Blow Glitter Fireworks
You will need -
- Brightly Coloured Paint
- Washing Up Liquid
- Small Bowl
- Straw
- PVA Glue
- Glue stick
- Brightly Coloured Glitter
- Scissors
- Water
- Card
Instructions -
1) Pour some paint into a small bowl and then add a few drops of water and washing up liquid to it. Use a straw to carefully mix these together and blow through the straw to create bubbles. The bubbles should have a slight colour to them, if they haven’t then continue to mix the contents of the bowl and blow some more bubbles. If there is too much water in the mixture you may need to add more paint. Alternatively if the mixture is too thick then you may need to add more water to get the right consistency.
2) Once the bubbles have a tint the colour of the paint then take a sheet of white card and gently press it onto the bubbles. Carefully lift the card off of the bubbles. Repeat this process with different coloured paint to create a range of fireworks and then leave to dry.
3) When the bubble prints are dry, mix some paint with a small amount of water to make a runny mixture.
4) Place one drop of the mixture into the centre of the bubble firework and use a straw to blow the paint in different directions. It is easiest to turn the paper as you blow to spread the paint in different directions. Then leave the paint to dry.
5) Once it is dry, apply a thin layer of PVA glue in strands coming out from the centre of the firework. Gently scatter glitter on top so that it sticks to the glue.
Heat Splat Fireworks
You will need -
- Dark Coloured Card
- Heating Tool
- PVA Glue
- Tape
- Glitter
- Red, Yellow and Orange Wax Crayons

Instructions -
1) Take a dark piece of card and a red crayon. Carefully tape the crayon to the paper.
2) Explain to the child you are working with how to use the heat tool by pushing the on and off button. Ensure that they understand that the tool will blow out hot air and it is important to keep their fingers away from the front of the tool. Demonstrate how to hold the tool by firmly gripping the base of the handle.
3) Turn on the heat tool and hold it above the tip of the crayon so that it heats the end and starts to melt it. It is important to slowly tilt the tool side to side so that when the wax melts it splats in different directions.
4) Once you have created a range of splats in red take off the crayon and tape an orange crayon onto the paper in a different place.
5) Following the same steps, turn on the heat tool and begin to melt the crayon remembering to tilt the heating tool so the splats are sporadic.
6) Once you are happy with the red and orange splats then take off the crayon and tape the yellow crayon on the card.
7) For the last time turn on the heat tool and melt the crayon to create a final top layer for the firework.
8) When the melted wax has cooled apply a small amount of PVA glue to the picture and add some glitter to finish off the firework.